CLI
You can use our CLI to deploy your app or you can connect your GitHub.
Tip: You can switch between CLI and GitHub deployment methods at any time from your App Settings page. See Switching Deployment Method for details.
Install
You can install our CLI using curl.
curl -s https://gh.zcloud.ws/scripts/zcloud-install.sh | sh -
This is going to install a binary called zcloud in your current directory.
If you need other installation options, check our GitHub repository
We recommend that you add this binary to your PATH so you can use it from anywhere.
Deploying using the CLI
You can deploy your app using the CLI. You need to inform two arguments:
--user-tokenor--env-token: authentication token (if both are informeduser-tokenwill be used)--env: environment name
zcloud deploy --user-token your-token --env your-env
You can get your user token from your user profile page and the env-token for your app env settings page. Or copy the whole command straight from the CLI deployment instruction in the app env page.
What our CLI does is simple: we zip your files in the current folder and send to our storage. Then we download from there and start the build & deploy process exactly as we do for GitHub connected repositories.
Ignore Files
Our CLI specifically supports an ignore file. To utilize this feature, create a .zcloudignore file in your root directory. Within this file, you can specify all files and folders that should be ignored during the deployment process.
By default, if a .zcloudignore file is not present, certain folders such as .git/, node_modules/, and .meteor/local are automatically ignored.
We strongly recommend ignoring at least the .git/ folder, as our build process only utilizes current files and will not navigate within your Git repository.
Git Repository
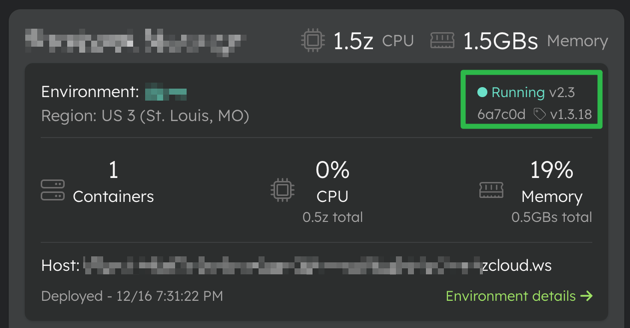
When running our CLI within a Git repository, the current commit hash, current branch, and the tags associated with the specific commit are sent to our servers. This information is then presented along with our version in the Quave Cloud web application.

Authentication
We provide two tokens: user token and env token.
Both are valid to run all commands, the difference is the scope of permissions. The user token is able to do everything this user can do in the web app, while the env token is able to apply changes only to this app environment.
Advanced Options
Arguments
--user-token: Token to authenticate the user (Optional, one token is required)--env-token: Token to authenticate the app environment (Optional, one token is required)--env: Environment name to create or update (Required)--env-var: Environment variables to set in deploy (Optional, can be used multiple times)--dir: Directory usage as source code to send to deploy (Optional, default value is current dir)--image: Docker image to deploy (Optional, for apps configured to use image deployment). See Deploy with Image for more details.
Root directory
In Quave Cloud web app you can configure your Root directory in the app Settings tab but keep in mind that if you use our CLI --dir option this directory is your root for this deployment as Quave Cloud build system is just going to receive this directory from the CLI upload.
So if you have a docs folder inside your root and you deploy using zcloud deploy --dir docs your app should be configured to consider docs as the root. For example, your Root directory should be ./ and if your Dockerfile is inside <your root dir>/docs/Dockerfile in your Dockerfile Path field you should set Dockerfile as the build system only sees the docs folder.
Using docker
docker run --rm -it --user $(id -u):$(id -g)  \
  -v $PWD:/source zcloudws/zcloud-cli \
  deploy --dir /source --user-token USER_TOKEN --env ENV_NAME
CLI Usage Examples
Default
zcloud deploy --user-token <token> --env <env name>
With one env var
zcloud deploy --user-token <token> --env <env name> --env-var ENVIRONMENT=production
With multiple env vars
zcloud deploy --user-token <token> --env <env name> --env-var ENVIRONMENT=production --env-var ROOT_URL=https://example.com
Env var content from File
zcloud deploy --user-token <token> --env <env name> --env-var METEOR_SETTINGS="$(cat settings-cli.json)"
With define env var type and set secret
zcloud deploy --user-token <token> --env <env name> --env-var '{"name":"DB_PASSWD","value":"abc123", "type":"DEPLOY", "isSecret":true}'
Deploy with Docker Image
For apps configured to use image deployment (build step is skipped):
zcloud deploy --user-token <token> --env <env name> --image myregistry/myapp:latest
Deploy with Image and Environment Variables
zcloud deploy --user-token <token> --env <env name> --image myregistry/myapp:v1.2.3 --env-var ENVIRONMENT=production
Note: The provided image should be built for the architecture
linux/amd64to run on our platform. For more details on image deployment, see Deploy with Image.
Deploying using Helm
You can deploy your app using Helm charts with the optional arguments. This strategy provides a Helm-based deployment solution for more customization.
zcloud deploy-helm --chart <path to chart> --values <path to values>/values.yaml --user-token <token> --env <env name>
Arguments for Helm Deployment
--chart: Path to your Helm chart (Required).--values: Path to your Helm values file (Optional, defaults can be used if not provided).--user-token: Token to authenticate the user (Optional, one token is required).--env-token: Token to authenticate the app environment (Optional, one token is required)--env: Environment name to create or update (Required).
With Helm deployment, you manage your Helm charts and values for extended control over your app deployment.
For information on what is processed during the Helm deployment, please refer to Helm Parse Information.
CLI Environment variables
ZCLOUD_USER_TOKEN: Token to authenticate the user. This is a replacement foruser-tokenargument.ZCLOUD_ENV_TOKEN: Token to authenticate the environment. This is a replacement forenv-tokenargument.ZCLOUD_ENV_NAME: Environment name to deploy. This is a replacement forenvargument.ZCLOUD_SRC_DIR: Directory usage as source code to send to deploy. This is a replacement fordirargument.ZCLOUD_TEMP_DIR: Directory usage to create temporary files. Default uses defined by OS.
Internal environment variables
__ZCLOUD_DEBUG: Used to print debug messges. Default isfalse.